Wine Bottle Drinking Glass
Intro
Drinking Glasses from Wine Bottles
Making drinking glasses from wine bottles has been around for years, and while it is relatively easy to cut a bottle, making a nice useful drinking glass is a little more difficult.
Yeah, I can go to Target and buy a set of glasses, but it is pretty cool to be able to use/recycle bottles that in many cases go in the trash.And of course, you can always take pride in the fact that you made them yourself!
WARNING: There is the possibility of injury from broken glass when performing the steps in this instructable. Proceed at your own risk!
Owner Rating
★★★★
Step 1
Get Your Bottle
Although you can technically make a glass from any bottle, I prefer wine bottles because they are much thicker than your typical bottle. Beer bottles in particular are very thin and more likely to break and cut you.
You'll also notice that most wine bottles have a big "dimple" on the bottom called the "PUNT". It is OK on a bottle, but not so nice in a drinking glass. Some people like the punt and glasses made from these bottles are often referred to as "punt glasses".
I prefer the flat-bottomed bottles commonly used with certain types of white wines. If you only drink red, try Bordeaux bottles, they are often flat on the bottom.
Beware: the nicer the bottle, the worse the wine usually tastes!
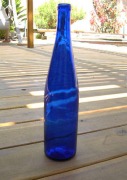
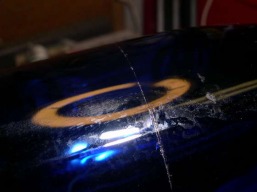
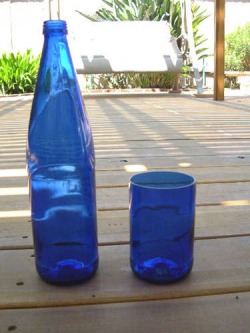
Blue bottles unfortunately usually contain bad white wine. I bought this one mostly for the bottle itself!
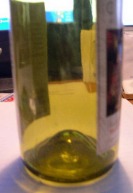
This is the "Punt". Some people like to make glasses with these because they are instantly recognized as coming from wine bottles. I don't.
Step 2
Cutting the Bottle (part 1)
OK, safety first:
Wear gloves and eye protection!
There are many tools and methods you can use to cut a bottle, I chose to use a bottle cutter called BC QUICK which I found online. It is all metal and I like it better than some of the plastic-framed models sold at craft shops. However, any jig that allows you to make a consistent scoring line around the bottle should be good enough.
This tool uses the scoring method which "cuts" a line around the bottle. Glass of course has a crystal structure to it and can't really be cut at room temp but rather broken in a controlled manner.
Once you score the line at a predetermined size you then move on to the next step.
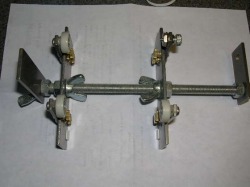
BC Quick-Silver bottle cutter
Your goal is to get a nice, even SINGLE score line around the bottle. Don't try to go over it again, it will only make the cut more jagged.
Step 3
Cutting the Bottle (part 2)
Using a candle and some patience, carefully heat the bottle at the scoring mark rotating the bottle as you heat it. Hold the bottle with both hands, one on each end. I will typically heat the bottle for about a minute and then drip cold water on the area. Repeat the process until the bottle suddenly breaks apart. You will actually hear slight cracking of the glass as you do this.
The first time I did it I was very tentative but now it usually takes me only about 5 mins to cut a bottle.
Be carefull, the cut edges are EXTREMELY SHARP!
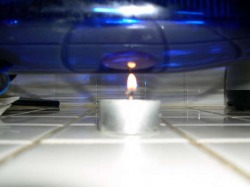
An ordinary tea light works great.
Notice I am only heating along the score line. Don't worry about the black soot from the candle.
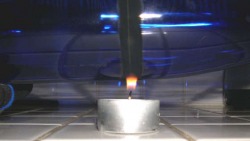
Keep a trickle of water running and alternate between the candle and the water.
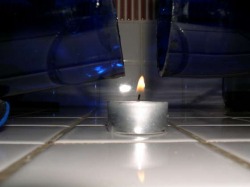
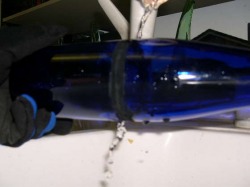
Sometimes the bottle will break while heating it, sometimes while cooling it. This one broke while on the flame.
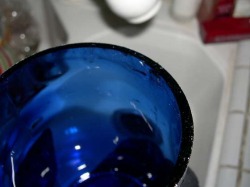
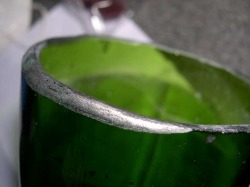
Notice how clean the break came out. Watch out, the edges are razor sharp!
Step 4
Finishing the Edges
OK, this is tedious part of the process. Obviously you don't want to cut your mouth every time you use the glass so you have to smooth out the rim.
Professionals who do this for a living will "flame roll" the edges of the glass making them shiny and smooth like a standard glass. Unfortunately that requires specialized tools and you'll want to carefully anneal the glasses afterwards to minimize the chances of cracking and breaking.
Using a Dremel tool, I first rough up the sharp cut using a Silicon Carbide conical grinding tip. Oh yeah, wear a dust mask, you don't want to be breathing ground glass!
Roughly grind the inside and outside of the edges using the Dremel. I also placed a strip of aluminum tape around the rim of the glass so that my grinding comes out as even as possible.
Continue to smooth out the edge using drum sanding attachments: I used 80, 120 and 150 grit. I would have used finer grits but that is all that I could find for the Dremel.
After a while, you'll have a fairly smooth edge that although usable, it is still kind of rough. Time to sand by hand using 200 grit sandpaper or finer.
You can keep going with a finer and finer grit, but if you want to finish the glass sometime this year, you'll call it a day after 200 grit.
You can also use a wire wheel on the lip, you'll get a shiny silver edge on glass that actually looks pretty cool.
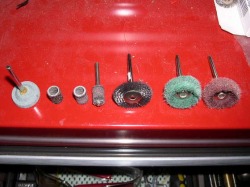
Progression of tools used from rough to fine.
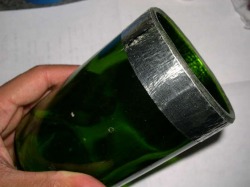
I used tape along the rim to protect the parts I don't want to grind/sand.
Optionally, you can use the wire wheel to get this nice silver shiny edge to the glass. - This was a test piece only, notice the difference between the rough cut edge and the rounded one.
Step 5
DONE!
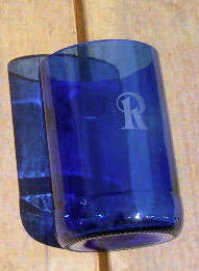
Before you stick your glass in the dishwasher, you can also etch your initials on your glass to make it truly yours.
Or etch the glass with your sweeties' initials, making it a nice gift.
DONE!
Before you stick your glass in the dishwasher, you can also etch your initials on your glass to make it truly yours.
Or etch the glass with your sweeties' initials, making it a nice gift.
Before and after.
Extra
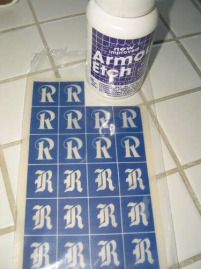
I used special glass stencils and Armor Etch, an etching cream for glass. Just follow the directions on the bottle.
Etching Cream (leave on for 5 mins and rinse)
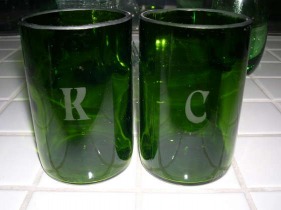
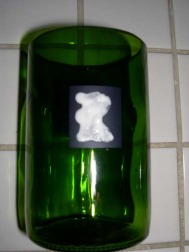
The Finished Etch
This project is owned by fstedie. All credit is given to the owner and this project and its pictures are copy righted by fstedie.
This project along with it photos are used with permission
This project along with it photos are used with permission
